
Multi-Factor Authentication for STUDENTS
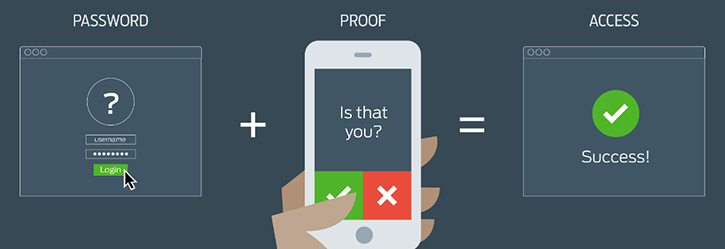
Multi-factor Authentication (MFA) is a way of verifying that people logging into our systems are indeed the people we think they are. In these times when malicious and phishing email attacks are a daily occurrence, MFA provides a way to limit the impact of these attacks and help ensure that only authorized people are accessing our systems. Through our existing licensing, we have access to the Microsoft MFA solution. This helps us to protect not only our email, but all of our data and applications authenticated through Microsoft 365.
What is MFA?
Simply put, MFA is a method of authentication that requires more than one verification method. This adds a critical second layer of security when users sign-in to a Chipola service that uses Microsoft 365 authentication. It does this by requiring more than one method of verifying that it is really you logging into the account.
How it works: MFA works by requiring both of the following verification methods to access your account:
- Something you know (your Chipola username & password)
- Something you have (a trusted device - your mobile phone
Microsoft 365 MFA Setup Video
1) MFA Setup: On your computer
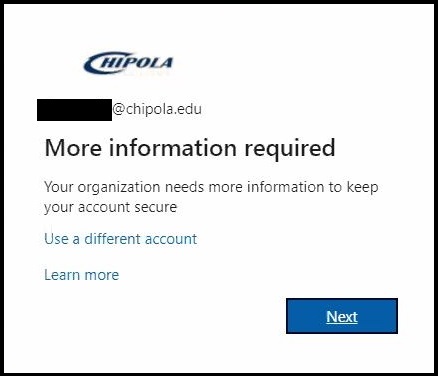
- Open a web browser and go to: https://aka.ms/MFASetup
- Login with your Chipola email address.
- You will receive the following message:
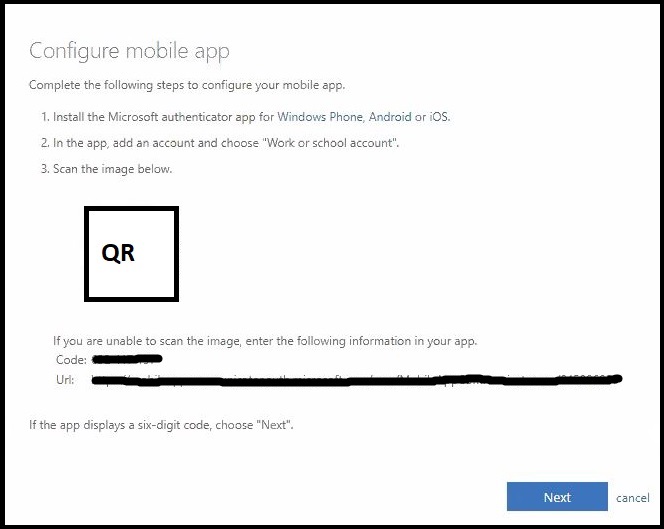
- The next screen will list all the options you have for MFA. Chipola IS recommends using the Mobile app option. Choose Mobile app from the first drop-down menu. Using the mobile app, there are two methods of authentication. Choose Receive notifications for verification. Click Set up in order to configure your app.

- This will bring up a QR code to your screen. Leave the QR code on screen and grab your mobile device. Follow the steps on the screen using the Microsoft Authenticator app.
2) MFA Setup: On your mobile device
- Navigate to the App Store or Play Store for your device.
- Search for "Microsoft Authenticator".
- Install that app and open it when installed.
- Click the + button in the center of the screen to add your account.
- Choose Work or School account.
- Allow access to your camera in the prompt. This will open a camera interface inside of the Authenticator app.
- Point the camera lens at the QR code on your screen.
- The app should automatically configure and start displaying a 6 digit code that changes every 30 seconds.
- Put your phone down with the app open, and go back to the computer.
3) MFA Setup: On your computer and phone
- On the QR code screen, click Next.
- This will bring you back to the MFA setup screen.
- Click Next in the bottom right.
- Grab your phone and look for the prompt to approve or deny the sign-in attempt.
- Click Approve on your phone.
- Put your phone down and go back to your computer.
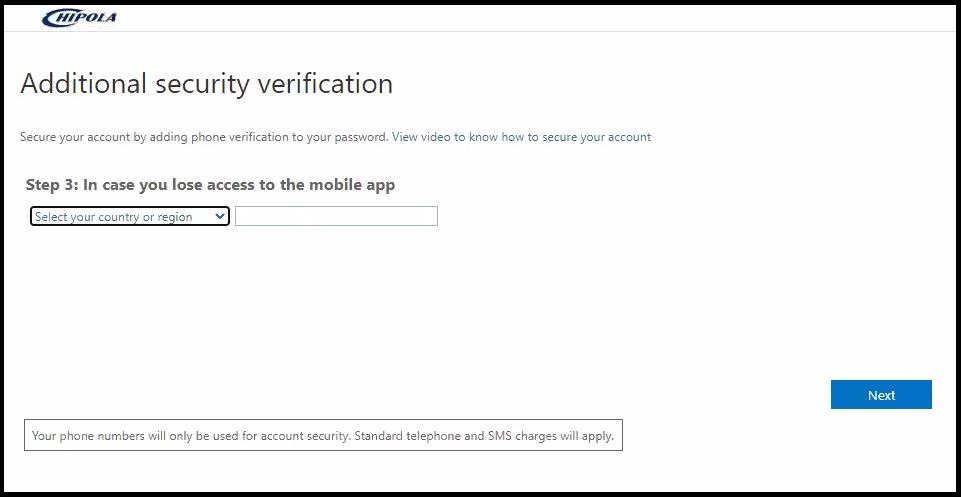
- On the next screen, you can setup your phone number as an alternate method, in case you uninstall the app or get a new smart phone.
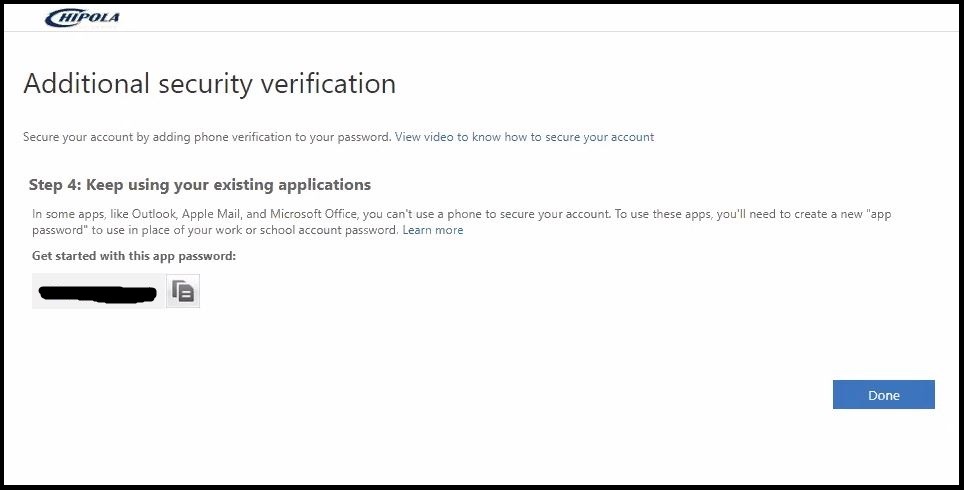
- Lastly, you will be introduced to your App Password. This is a unique password that you can use for logging into your account on devices that do not support MFA. Your app password is generated automatically by the system and CAN ONLY BE VIEWED ONCE. Click Done.
- That's all there is to it! Whenever you sign in to Outlook or the Office 365 portal, you will be prompted to approve the Sign-in.
Frequently Asked Questions (FAQ)
Q: How do I change my verification method for MFA?
A: You can change your verification method inside of the Microsoft 365 Web Portal. While we outlined the steps to configure the app, all verification methods are acceptable. You can also change your authentication method here: https://aka.ms/MFASetup
Q: Is there another way besides the mobile app that I can authenticate MFA?
A: You can get a text message or a phone call as additional options to authenticate your MFA. See other options below:
- To use the text message authentication: On the Step 1: How should we contact you? screen, choose the "Authentication phone" option and put in your mobile phone number.
- To use the phone call authentication: On the Step 1: How should we contact you? screen, choose the "Office phone" option and put in your phone number that you will accept the phone call for authentication. When you answer the phone during an authentication attempt, the message will ask you to hit the # key to verify.